 |
| (36) The way the points are put in is important. the black fine lines should touch the black formline. These are the same rules that painters and carvers follow. |
 | |
| (34) I am forming the top black form. This will begin shaping the central face and the side faces. The side faces upper ovoids are being formed. |
 | ||
| (33) |
 |
| (31) Here is my pattern. I projected a photo of the original robe and created an "at scale" drawing. I painted it with India Ink so it would be protected from moisture. |
 |
| (30) A circle is started by first creating the upper circle shape by weaving the yellow then putting in the braids. |
 |
| (24) Blue/green on the outside shapes is pretty standard for naaxiin robe designs. I am happy to be at the point now to add this lovely color. |
 |
| (26) Three strand braids ALWAYS surround shapes. |
 |
| (27) |
 |
| (28) Scroll down the photos to see the beginning of the robe. |
 |
| (1) Tiffany Amber Vanderhoop, Evelyn's Daughter and Novella, youngest granddaughter, pose with warp balls ready to hang on the loom. |
 |
| (3) The loom is being, "warped"!! |
 | ||
| (4) Tiffany Amber Vanderhoop my assistant, she helped spin warp and cut and hang the warp on the loom |
 | |
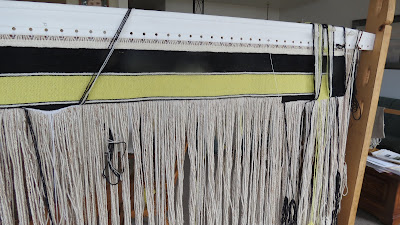
| (6) The heading is woven and now the start of the black border is begun |
 |
| (7) I am weaving at the Museum of Anthropology (MOA) in Vancouver. This was in mid March 2013 |
 |
| (8) Here I am standing next to the sign that was put up to introduce the public to me. |
 |
| (9) Back home I continue to weave the black border. The wefts I am using are "lace" weight and the going is slow. |
 |
| (10) Finally, I was able to change colors and now I am weaving the yellow. |
 |
| (11) The black border is now vertical along the outside of the yellow so there are joins and braids to attend to as I weave the yellow border. |
 | ||
| (13) The braids are entered and run horizontal under the yellow border and will turn the corner and run vertical. |
 |
| (14) I am starting in the middle to add the shape that forms the forehead of the main face. Shapes always start with entering braids. |
 |
| (15) Two strand black twining fills in the shape by weaving back and forth going in a few warps each time the woven row is turned. |
 |
| (16) A white resultant form is entered first with braids then with two strand white weaving. |
 |
| (17) I then go to the upper outside edge designs and start them. |
 |
| (18) The black and yellow borders are also worked on and are brought along vertically. |


Evelyn, I am honored to read your blog and see your stunning weaving. I read your artists reflections in the Bill Holm’s book “ Northwest Coast Indian Art”. Yes it is a sign from the universe that you are doing what you are meant to do; by weaving and teaching others this the ancient art form.
ReplyDeleteLast month I visited the Haida Gwaii Cultural Center and took away lasting images of the art and culture! A world treasure!